Creating the Visual Studio Installer (VSI) for SOLIDWORKS application
{% youtube { id: JRc1vx1snv4 } %}
Installing the VSI Extension
Download the Microsoft Visual Studio Installer Projects Extension from Visual Studio Marketplace. Find the version which matches your Visual Studio version.
It is recommended to close current session of Visual Studio when installing this extension.
Creating setup project
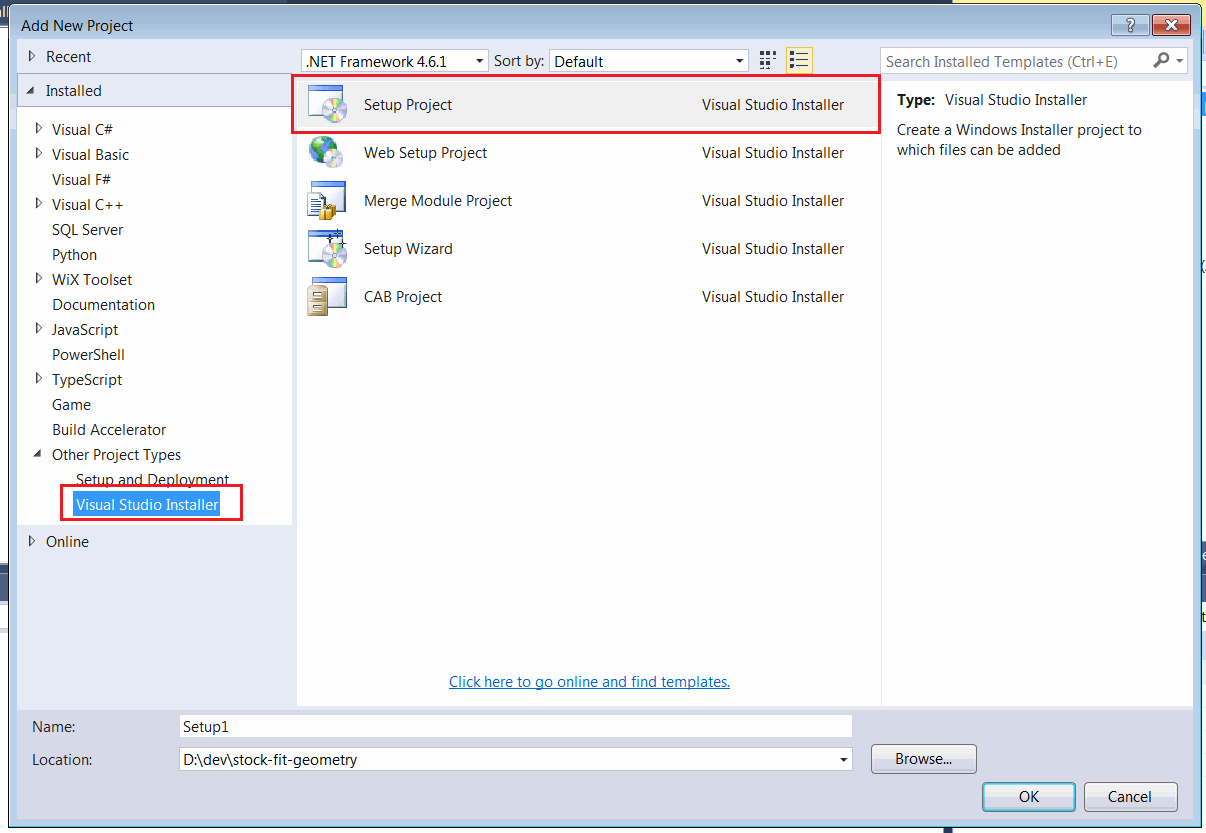
Add new Setup project to the solution which can be found under the Other Project Types->Visual Studio Installer section.
 { width=450 }
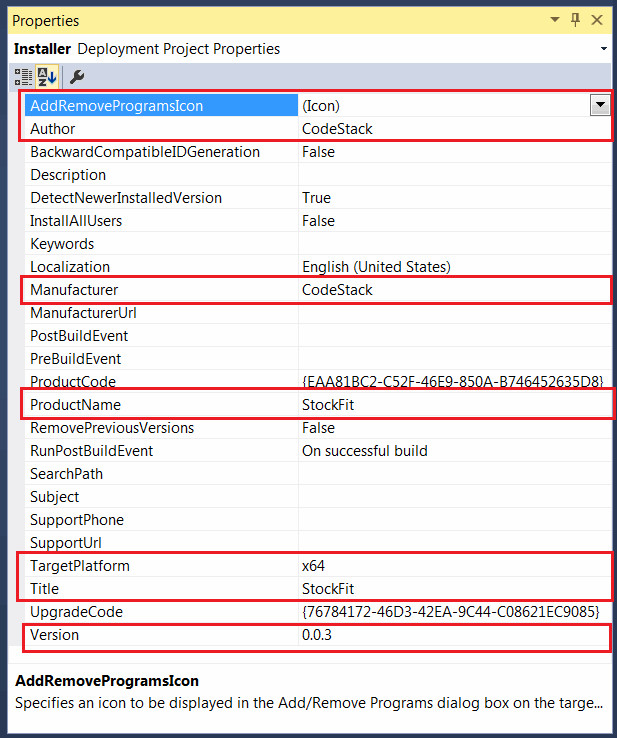
Configure the attributes of the installer by selection Setup project in the solution tree and changing the attributes in the properties page.
 { width=350 }
Make sure to select the correct version of the platform. Default option x86 should be changed to x64 to support 64-bit versions of SOLIDWORKS.
Adding installation files and COM registration
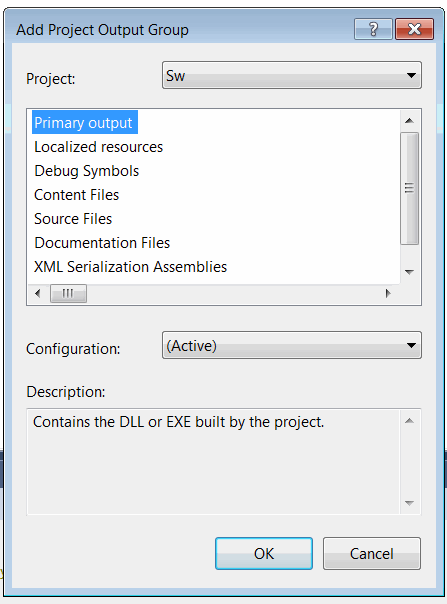
Click right mouse button (RMB) o the project node and select Add-->Project Output... command from the context menu.
 { width=300 }
Select the main project of the add-in in the drop down and select Primary Output option
 { width=250 }
This will allow to add the dll into the setup as well as all dependent dlls and files.
 { width=250 }
This will also register the COM objects in the dll.
Customizing installer view
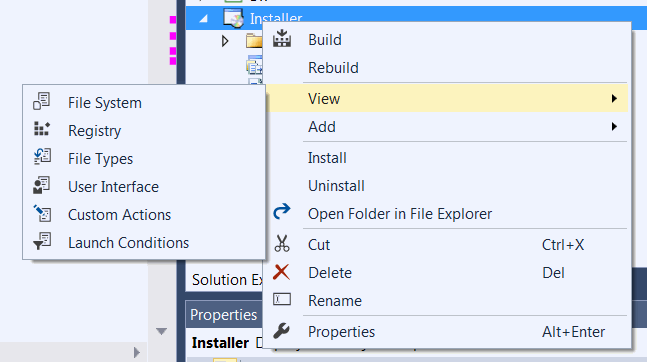
Installer can be customized and new components can be added via installer views.
 { width=300 }
Adding registry entries
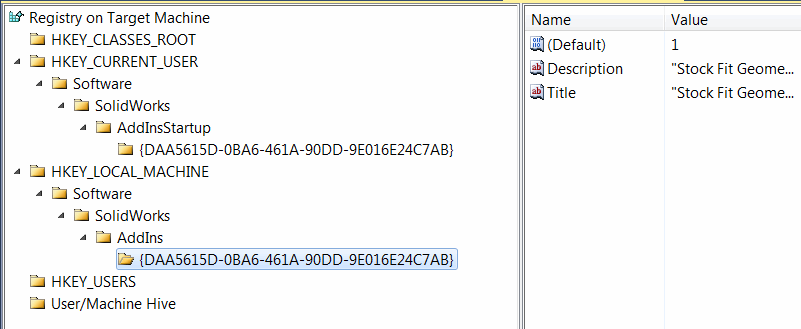
Registry values need to be added into the SolidWorks registry section to make SOLIDWORKS recognize the add-in.
Open the Registry View
 { width=350 }
Add the following:
HKEY_LOCAL_MACHINE\Software\SolidWorks\Addins[{ADDIN GUID}]
And add the following fields to this key:
(default) (DWORD Value) equals to 1. Simply leave the field name empty to set it to default (do not type (default) explicitly)
Title (String Value) - value is a title of the add-in
Description (String Value) - value is a description of the add-in
In order for the add-in to be loaded at startup add the following key
HKEY_CURRENT_USER\Software\SolidWorks\AddinsStartup[{ADDIN GUID}]
Add the default DWORD field with value 1
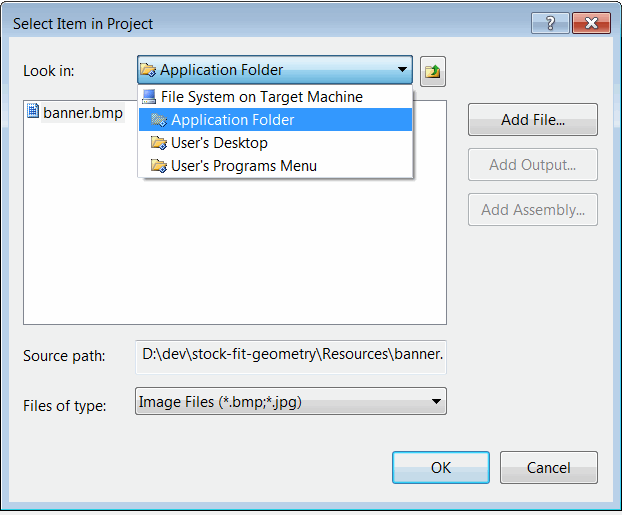
Adding resource files
Add the resource files to the installer by RMB on the add-in project and selecting Add->Files menu command. The resource files can be used to add icon to the installer, banner images, EULA etc.
Customizing User Interface
Open the User Interface view. This view contains the list and order of all pages displayed during the installation process.
 { width=150 }
Pages can be customized, added, deleted and reordered.
Select all pages and set the banner image. Banner image displayed at the top of the installer and is a bitmap (bmp) or png file of 500x70 pixels size.
 { width=300 }
Change the banner attribute by browsing the bitmap resource added in previous step.
 { width=300 }
More pages can be added to the installer, such as End User License Agreement (EULA) or registration page.
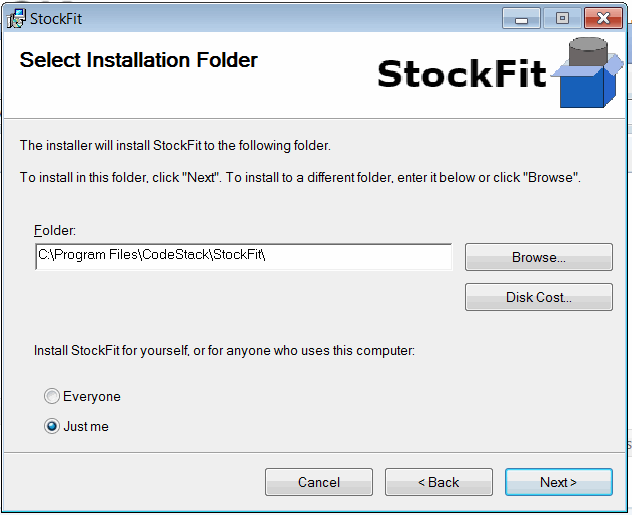
Installing add-in
When project compiled the msi package is generated in the output directory. This package can be redistributed to the user for installing your product.
 { width=300 }
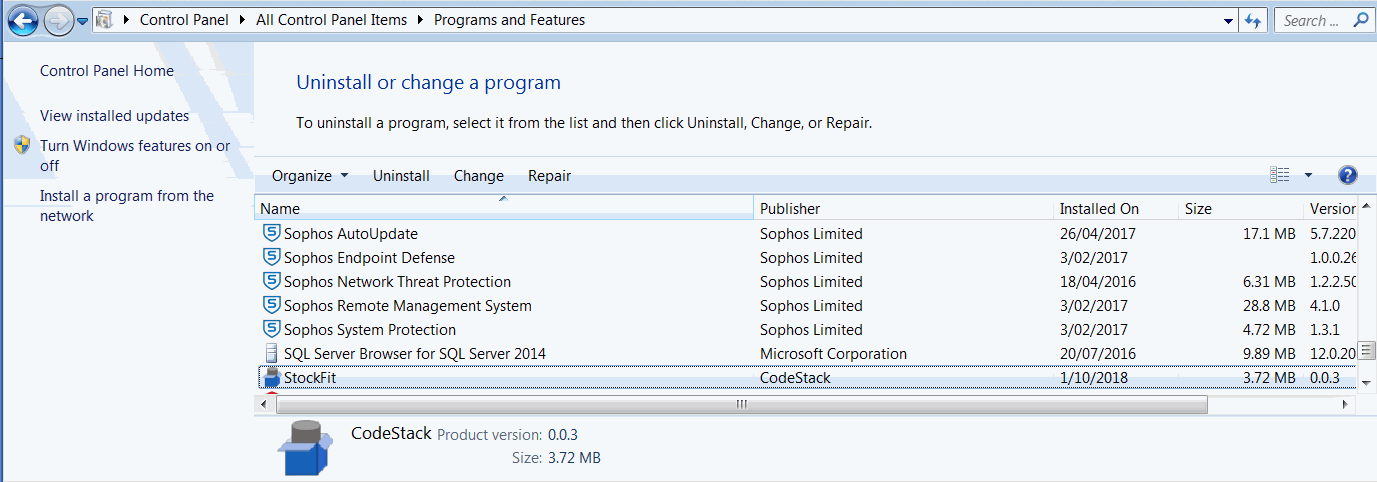
Once installed the product icon appears in the Programs and Features page of the Control Panel. The product can be repaired or uninstalled within this page.
 { width=650 }
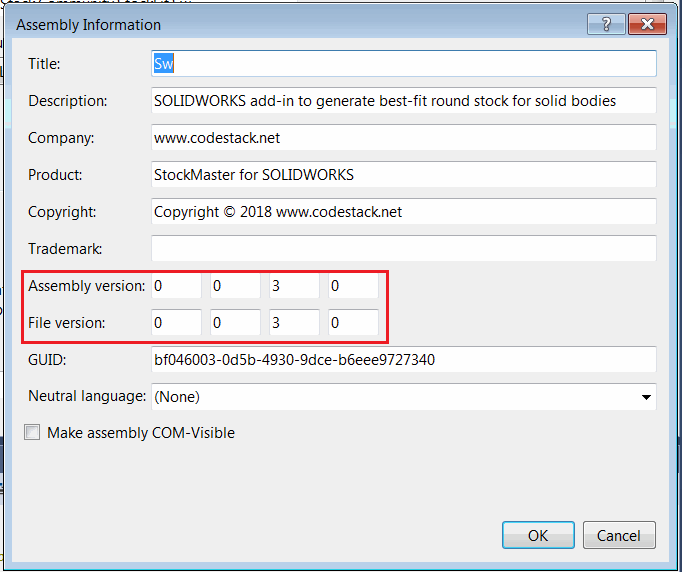
Releasing update
When product update is required and new installer needs to be redistributed it is required to update the version of the installer.
The following message may be displayed.
 { width=300 }
It is required to change the Product Code for every new version while Upgrade Code should remain unchanged. This will allow users to upgrade without the need of uninstalling previous version of add-in (if already installed).
It is required to change the assembly versions of all changed projects otherwise the installer would not update the dlls on the target machines.
 { width=300 }